- google-authenticator – Two-step verification – Google Project Hosting
Open source two-factor auth project from Google.
(categories: authentication security google two-factor ) - Everything I Ever Learned About JVM Performance Tuning @Twitter
Deep GC tuning preso from Twitter. Thanks to Throck @ work for the pointer.
(categories: java jvm performance tuning twitter )
Monthly Archives: June 2013
Links: 6-21-2013
- Management: What are common mistakes that new or inexperienced managers make? – Quora
Good list of stuff that engineering managers should be thinking about / doing.
(categories: engineering software management amazon )
solar panels for the chicken coop
Haven’t felt like I’ve built anything lately so I hauled off a couple weekends ago and figured that it’d be fun to try and replace the 50ft extension cord that we’ve got running from the house to the coop (up the hill, over the lawn, on top of the coop and then into the coop) which has been hooked up to timer switch (most likely something like this) to then provide light for the hens for a couple hours a night with solar panels, since it sounded fun.
I did a little bit of research, this was the best blog post that I came across that talked about how to do it (semi-related: helpful video on the subject of solar and power, also learned what a “prepper” is, had no idea those existed!), although in hindsight it looks like their coop is being powered by light all day long… or at least on demand, which turned out to be kind of a big deal. As the post suggested, I went to Harbor Freight and got some solar power panels, which came with a charge controller, a couple light bulbs and all the necessary cabling. It was relatively easy to snap together the plastic frame that came with the panels (although the directions were definitely different than what was in the box, took me a bit to figure that out) and then to push the various wires together to see if it all worked. I also bought a little battery and a 400 watt power inverter since I had an existing light bulb sitting in the coop already.
I’m a rookie at the electrical stuff, figured it’d be good to hook up the inverter to the battery to make sure the battery was good, which I did and then immediately melted battery connector cable because the opposite cable ends were touching after I hooked up the cabling to the battery. Rookie mistake but that then meant that I had to find a new cabling. Slight setback. Googled around a bunch looking for somewhere that I could buy a battery connector cable, not many places sell them… or at least sell them and aren’t somewhere that it would take a week to get one. I ended up talking to a pal at work that’s an electronics nerd (hey Ed!) and he suggested going to Oregon Electronics, who have a local store here in Beaverton and who ended up actually not having pre-made battery connector cables but had all the tools and supplies to MAKE cables which was even more fun. I bought a couple sets of wiring, some clamps and a cable crimp tool with the help of the guy running the store (whatever your name was, thanks!) and then made my own cables. I also needed a box to put the battery and the power inverter in (since the installation is outside) and found a nice water tight box at Storables (not this exact one but something pretty similar).
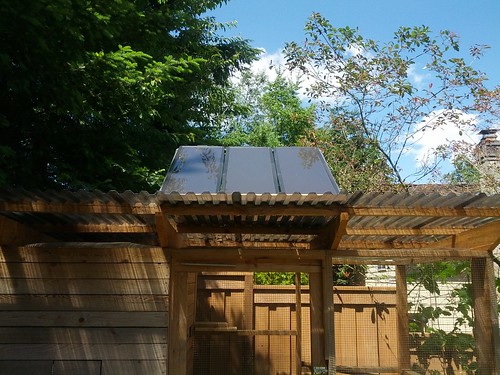
I thought at that point that I had all I needed but it turns out the power inverter that I bought has a fan and is constantly drawing power to power the fan, even if the lights aren’t turned on. I had figured that I could use the existing timer that was plugged into the house to plug that into the inverter and then only turn on the lights if / when the timer thought it was time but I’m pretty sure that the inverter being on 24/7 would drain the battery and would leave me with no power for the lights at night. I ended up finding this really really cool charge controller that has a built-in microcontroller that figures out dusk / dawn by when the solar panel stops sending a charge and gives you the ability to determine how long you want the lights turned on relative to when dusk and dawn start. Ordered that online and then FINALLY today everything came together. Here’s what the solar panels look like on top of the coop:
and a side view:
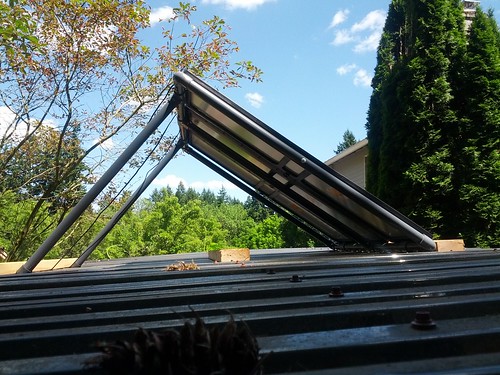
I actually have no idea if they’ll draw enough power in the wintertime to power a light bulb for a couple hours a night based on a) the fact that we live in Oregon and don’t see the sun that much / if at all in the winter and b) our yard has lots of shade, which means that even if the sun was out that the panels would only ever see the sun for half the day or so… which might also throw a kink into the charge controller, which may stop receiving charges from the panel earlier than we might expect… ANYWAY, fuzzy picture of the box mounted on the side of the coop:
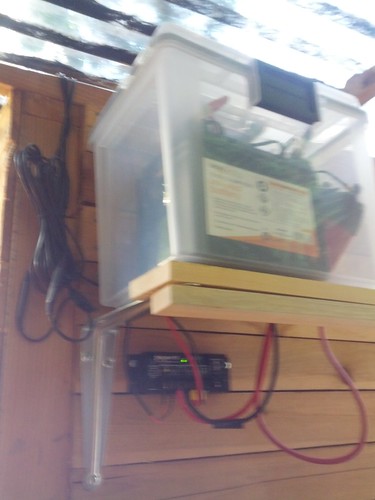
I drilled a couple holes in the bottom of the plastic box so that I could string the wiring in and also so that the inverter was able to breathe, apparently it needs some circulation. Got the brackets to hold the box at Ace Hardware for $10 and then mounted those to the coop along with some wood I had laying around from another project.
Finally a picture of the Morningstar SunLight charge controller doing it’s business:
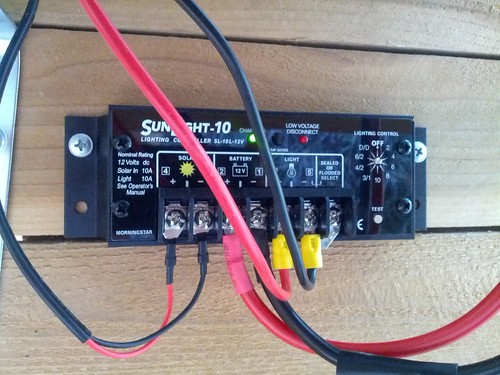
You can see the lighting control on the right hand side, it gives you a bunch of options as to how long you want it to be drawing power from the battery and throwing it to an external device, which is perfect, in theory for what I’m trying to do since I don’t want the inverter to be drawing any power at all… until I want the lights on. Luckily, the inverter, which also has an on / off button, stays “on” even when you remove it’s power supply, so the minute that the charge controller decides that power should come on, the inverter then turns on… which then powers the lights and in theory, the chickens should lay more eggs in the winter. I don’t pretend to control that part though.
You can also see the wiring I created in that picture: the black / red wires with the yellow battery connectors are the wires that I made. Those go into the box and then attach to the back of the inverter. Going from right to left then, the next set of red / black cables are the cables that attach up to the battery and the finally, the last set of cables are sending power from the panels to the charge controller.
All in:
– panels + charge controller (not used) + cabling + bulbs (not used): $150
– 12 volt / 35 amp battery: $69
– 400w inverter: $40
– 12 volt / 20 amp charge controller with microprocessor: $83
– crimp tool (optional), cabling (optional): $32
– storage box: $20
Really expensive, should have just run cable underground (assuming that’s legal?) to the coop in hindsight but the panels seemed more fun / more interesting. I’ll update once winter hits and the sun actually stops shining again.
Links: 6-6-2013
- Where the Happy Talk About Corporate Culture Is Wrong – NYTimes.com
Another bit on culture at work.
(categories: business culture management people happiness ) - Some thoughts on mobile – Chris Dixon
Quote: "… The best entrepreneurs understand these dynamics and have been exploring “attach” business models, which basically means charging for something outside of the app store, like offline products/services (e.g. Square, Uber), online services (e.g. Spotify, Dropbox), and sometimes even hardware. Most of the companies that have succeeded (= generate real revenues/profits) on mobile were either desktop incumbents (e.g. eBay, Amazon, Facebook) or have attach business models."
(categories: android ios mobile appstore )